Taking the Colour Away. Reverse dyeing! Welcome to part 2 of a 3–part series of experiments I did using bleach to rescue some items in my wardrobe. Tie Dye Bleaching!
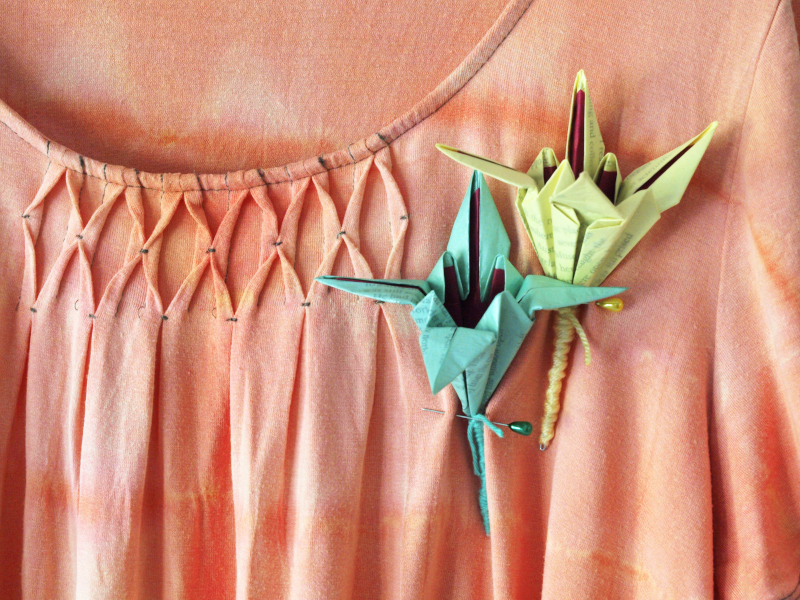
This partially smocked T-shirt was a favourite of mine, and I was disappointed when it was spoilt by some bleach splashes.
So I decided to tie-bleach it. Once again, much like the previous bleaching project, I was pleasantly surprised by the tender tangerine under-colour that emerged
This is the shirt I started with:

This is how I concertina-folded it and tied it with string: 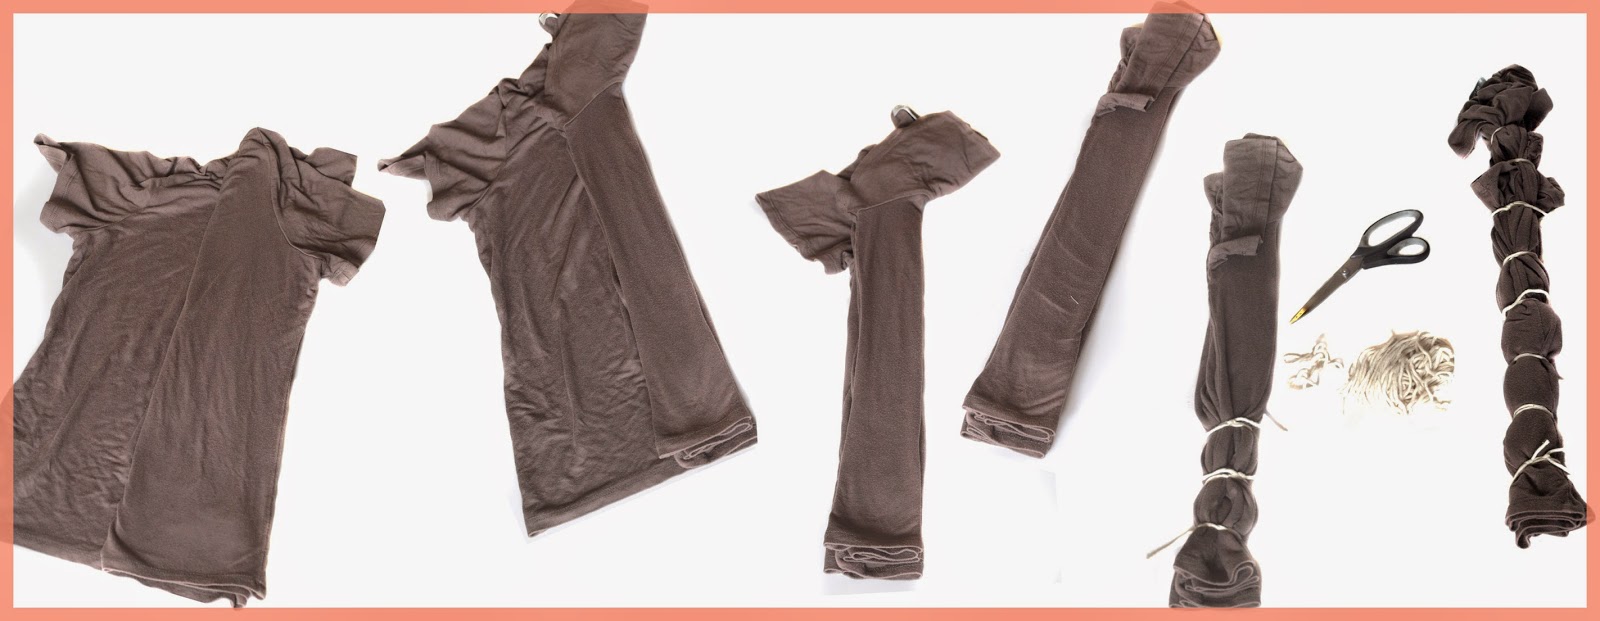

Then I dipped it in a bleach solution, (See my bleaching DIY method and hints below.)
This is how it turned out 🙂

 How to Remove Colour from Fabric :
- Mix some household bleach and boiling water in the ratio of about 1:20.
- Make sure there is enough to easily cover the shirt and allow for free movement, so that it would bleach evenly.
- Soak the shirt, stirring often.
- Observe the colour change. Thoroughly rinse the shirt when you want the bleaching to stop.
- A simple process, and a ‘new’ item
Some bleaching hints and tips to bear in mind:
- There’s no guarantee of the outcome. Sometimes the colour will lighten, sometimes all the colour will bleach away, and sometimes you are left with an underlying colour. The fabric may even disintegrate if it is fragile.
- Keep the article moving freely, to make sure that it bleaches evenly.
- Use warm water.
- Keep the time that the article is in the water to a minimum, as the bleach will weaken the fabric
- Be aware that the stitching often remains darker or does not bleach
- Protect the clothing you are wearing. You don’t want to accidentally bleach them in the process.
- Remember that bleaching patterned or striped fabric can give you an interesting result.
- Cotton and linen work best. Synthetic fabrics tend to keep their colour.
- What should you bleach? Clothing that has accidental bleach stains, tired or stained clothing, or clothing you would like to experiment with.