This is a tutorial to make the simple button bracelet (on the left) that can be used as a basis for more decorative threaded bracelets (centre and right)

You will need:
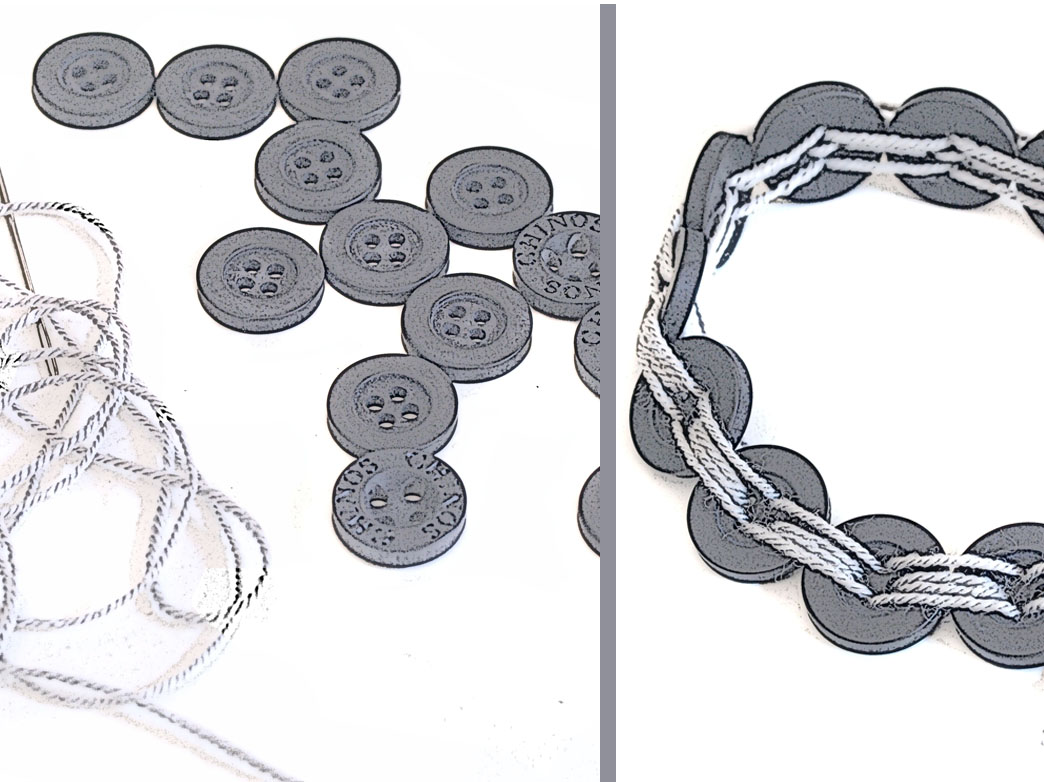
Buttons with 4 holes. Place the buttons along side each other (1) and measure a length of buttons between 20 – 22cm long. Try to end up with an odd number of buttons. The length of the bracelet can be checked after step (11) to see if it is suitable to fit firmly over your hand and onto your wrist comfortably.
Thread – I find crochet cotton works very well (2)
A thick needle
How to Make It
Thread the needle. Take the first 2 buttons. Place them right sides together, aligning the holes. Bring the thread through the top button holes from underneath (3), leaving a short thread tail (4). Repeat – the stitch again – making a double stitch (5)
The stitching should be firm, but not too tight. The buttons should lie close together, but the string should be flexible.


Open the buttons up (6) and place the next button, right sides together with the top button (7). Do the same double stitch as before (8). Keep going until all the buttons have been stitched together in this way (9), (10), (11).
 Hold the bracelet together in a circle and check the fit. Add or remove buttons accordingly.
Take the first button of the string and bring it up right sides together with the last button. Stitch it together in the same way as the other buttons. Tie the threads together underneath. This forms the basis of the bracelet. (12) (13)
To complete the next steps of the bracelet – consult the button diagram on the right.
With a new thread, come up through hole [d] in the first button (14) and down through hole [d] in the next button (15). Repeat all the way around. (16). Go around a 2nd time, until all the [d] holes are linked with thread stitches on top and underneath. (17) (18)
Repeat on the opposite side of the bracelet, linking all the [b] holes with thread stitches. (19) Your bracelet should look like this (20) (21)


 Tie off loose threads underneath. You may like to stitch the loose ends into the back of the bracelet too, or wait until you have done some more decorative stitching. This forms a sturdy basic button bracelet.
Continue to instructions for making decorative bracelets here:
Note – Mostly, I’ve used crochet cotton like J&P Coats Knit Crosheen or Elle Crochet from my own collection. I buy my cottons from Wool and Weave in Hillcrest – An inspiring place to visit if you are a local Durbanite.
First the buttons are linked together with thread stitches – to form this basic. Then the decorative stitching is added.
If you’d like to make this one yourself, this is where you can find the tutorial for the Fun decorative part:Tutorial for Decorative Stitching on Basic Bracelet.
Read more about these bracelets on the Freshly Found Blog